
新手引导---1 简单的项目规范以及关卡设计

ahunziinwuxi
本篇文章将简单制作一个平台跳跃游戏,包含1个关卡,3个难度。
难度0:小怪和首领不会对角色造成伤害,坠落y>1000判定死亡。
难度1以上:小怪和首领会对角色造成伤害,坠落速度>2000判定死亡。有陷阱。
难度2以上:小怪和首领会对闪避。
项目使用gdscript编写代码,代码行数约为300(不包括着色器代码)。
现在根据godot的项目结构进行基础的项目规范梳理。
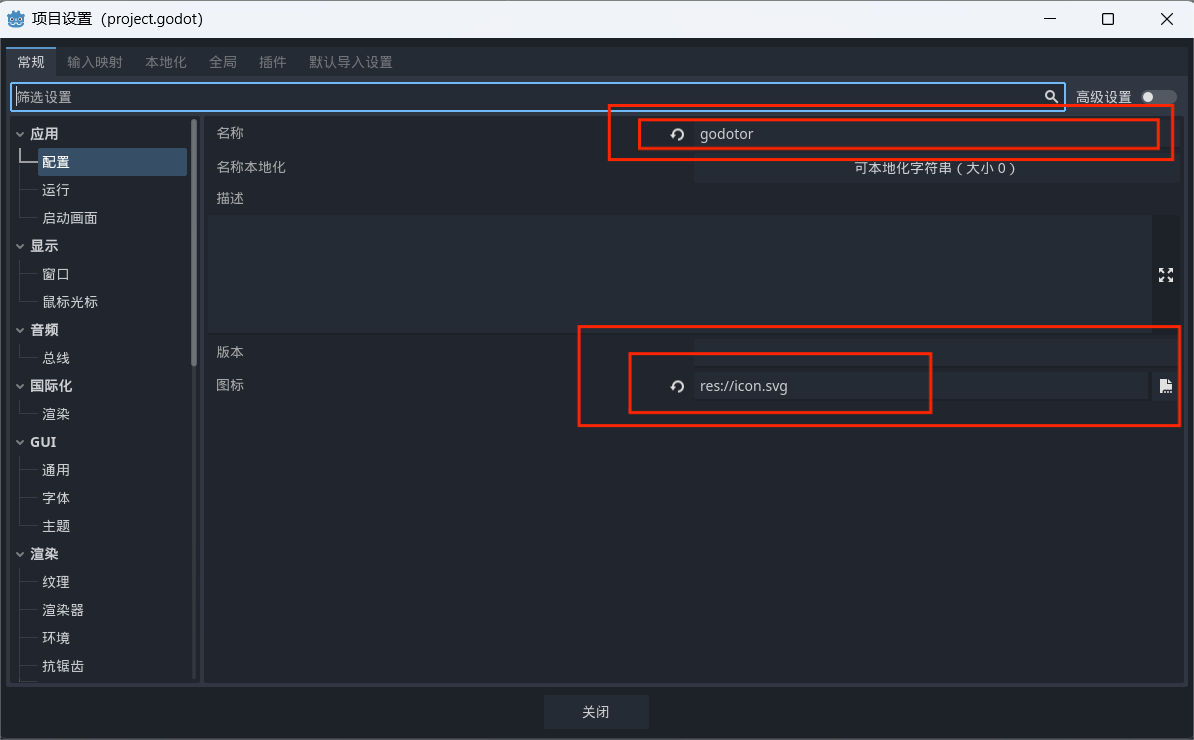
在“项目设置” - “应用” - “配置”中,有关于应用的基本设置。包括项目名称、图标、描述等内容。
“项目设置” - “应用” - “启动动画”决定启动时播放的动画。
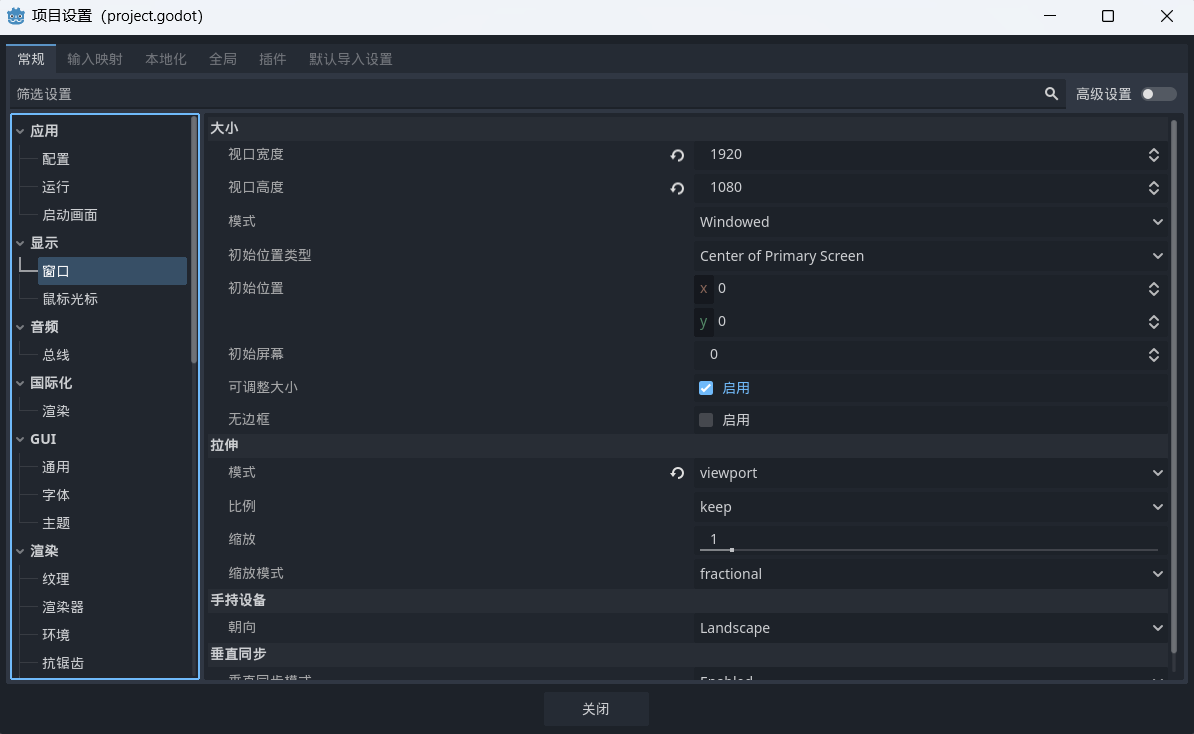
在“项目设置” - “显示” - “窗口” - “大小”中,“视口宽度”和“视口高度”对应分辨率。“模式”中,“Windowed”代表窗口模式,“Fullscreen”代表全屏,此外其他模式本文不进行描述。“无边框”代表去掉窗口的边框。
在“项目设置” - “显示” - “窗口” - “拉伸”中,一般2D游戏可以使用“viewport”模式,使用“disabled”也同样可以,不过“比例”选项会失效。“canvas_items”模式,2D游戏的渲染可能会因为视口宽高与屏幕不匹配而造成图像变形,因此不推荐使用。
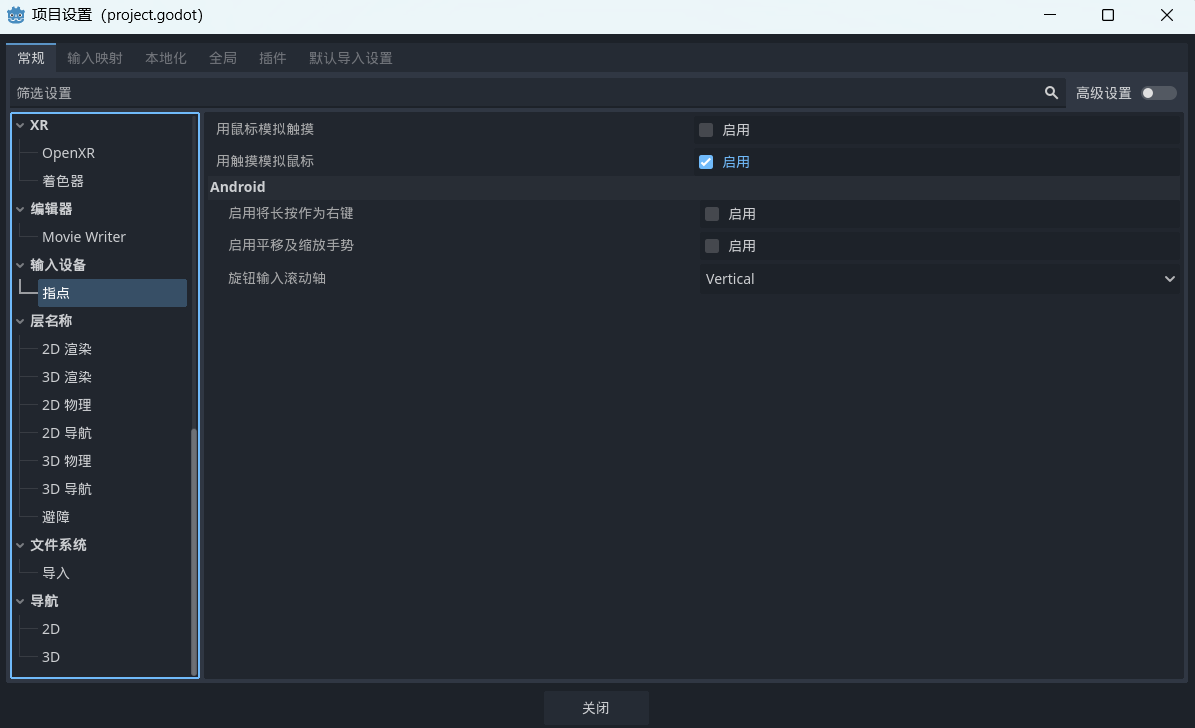
如果涉及移动端,或者其他设备,则需要注意更多的细节,比如输入,本文不做多介绍。
进入正题
项目大致布局
关卡场景,名称为“level_1”。
玩家控制的游戏主角。
小怪角色。
怪物首领角色。
无用的npc。
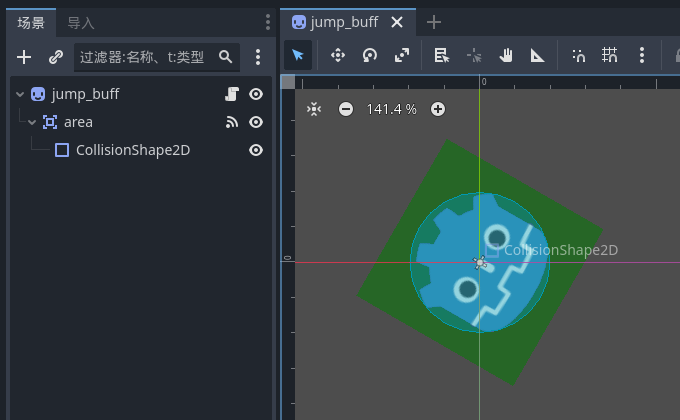
有用的buff。
先从简单的开始
其实游戏本身是偏美术和剧情的作品。在实际游戏制作时,尤其是2D游戏,正常情况下应该使用合适美术资源,而不应该着重于着色器渲染。本文展示项目仅用于游戏玩法设计示例,不应直接用于项目参考。
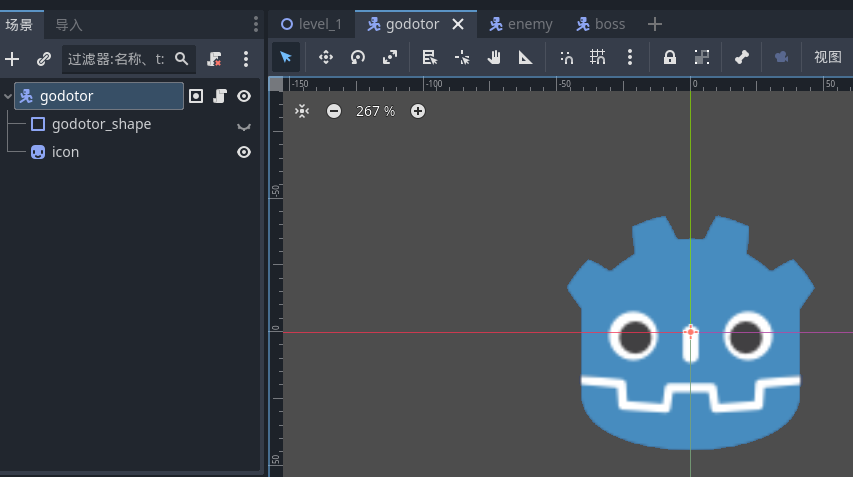
在实际项目中,如果项目是构建角色扮演类游戏,那么首先需要角色。
将其命名为“godotor”,放入“charactar”文件夹中。
得到角色之后,我们需要测试角色的移动控制,所以由需要一个关卡背景放置角色。不要忘了调整角色的碰撞形状。平台跳跃关卡需要创建墙体,实际项目中其实使用瓦片地图会更好,但本文使用直接搭建的方法仅作示例。
将其保存为“test_level”,放在“level”文件夹中。将“godotor”拖到场景中。
完成后我们需要给场景添加一个跟随角色的视口,使用“Camera2D”节点,并设置脚本。
分组是godot自带的分类器,可以通过get_tree().get_nodes_in_group("123")获取在名称为“123”的组中的所有节点。一个节点可以在多个组中,一个组中也可以有多类不同的节点。
回到“godotor”场景,将“godotor”添加到“charactar”分组,以便后续操作。
完成后回到“test_level”按“F6”运行当前场景。
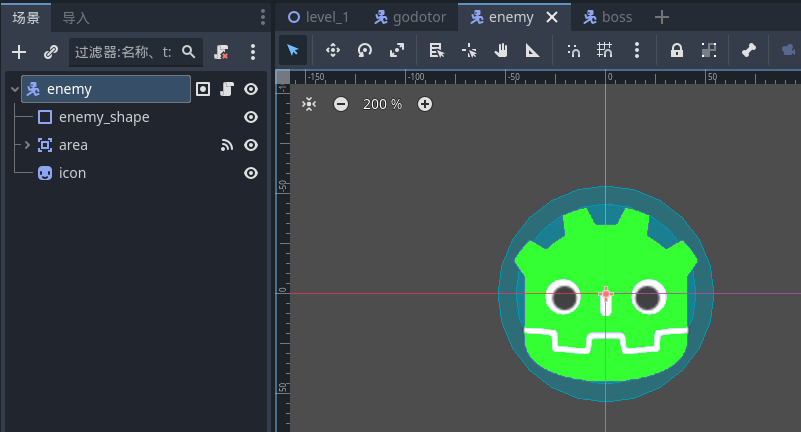
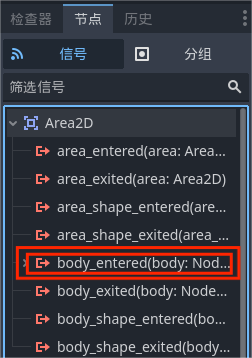
完成后添加小怪。与角色不同的是,小怪需要程序控制自动移动,如果需要小怪对玩家控制角色造成伤害,还需要设置伤害检测区域,这时就需要用到“Area2D”节点。“Area2D”节点与“CharactarBody2D”节点类似,都需要添加碰撞形状节点“CollisionShape2D”,但“Area2D”节点不参与物理阻挡,只检测是否碰撞。
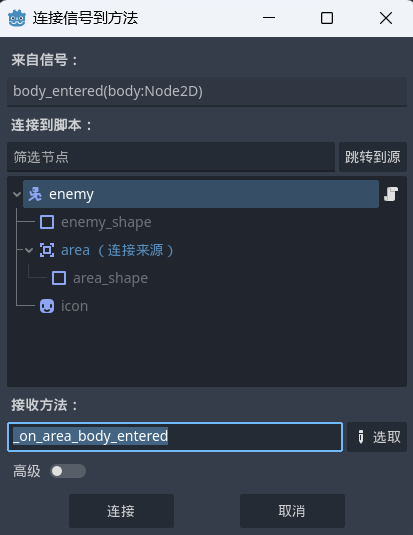
“Area2D”节点的碰撞检测可以通过连接信号进行使用。选中“Area2D”节点,在右侧的属性面板中选择“节点”,可以看到有很多信号可以使用。这里使用body_entered(body:Node2D)函数,其中的“Node2D”可以改为“CharactarBody2D”,缩小检测范围。
双击后可以选取存放的位置和函数名称,也可以自己命名。
我使用的小怪控制代码如下:
extends CharacterBody2D


var speed = 350


func _physics_process(delta: float) -> void:
	#计算重力
	velocity.y += 1000 * delta
	move_and_slide()
	#如果存在目标
	if get_tree().root.get_child(1).has_node("godotor"):
		#将角色设置为目标
		var target = get_tree().root.get_child(1).get_node("godotor")
		#如果横向绝对距离小于500
		if abs(target.position.x - $".".position.x) < 500:
			#如果目标不在躲避范围内,进行追踪
			if abs(target.position.x - $".".position.x) > 80:
				#如果目标在右侧
				if target.position.x > $".".position.x:
					#向右移动
					velocity.x = speed
				#如果目标在左侧
				if target.position.x < $".".position.x:
					#向左移动
					velocity.x = -speed
			#难度2及以上
			if global.difficult >= 2:
				#如果目标在躲避范围内,进行躲避
				if abs(target.position.x - $".".position.x) < 80:
					#如果目标在右侧
					if target.position.x > $".".position.x:
						#向左移动
						velocity.x = -speed
					#如果目标在左侧
					if target.position.x < $".".position.x:
						#向右移动
						velocity.x = speed
	pass

#如果有CharactarBody2D节点进入area的检测范围
func _on_area_body_entered(body: CharactarBody2D) -> void:
	#如果节点名称为“godotor”,也就是玩家控制角色
	if body.name == "godotor":
		#如果角色碰撞的位置不高于中心点65
		if body.position.y - self.position.y > -65:
			print("桀桀")
			#难度1及以上
			if global.difficult >= 1:
				#删除角色(角色死亡)
				body.queue_free()
		#如果橘色碰撞位置高出中心点65点
		else:
			#增加角色的属性
			body.jump_velocity -= 200
			#删除自身(小怪死亡)
			self.queue_free()
	pass
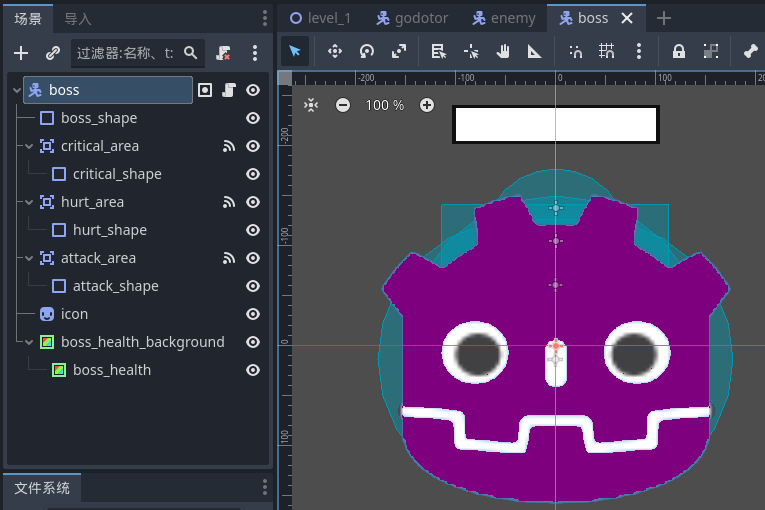
boss类似,血量可以使用进度条控件“ProgressBar”或“TextureProgressBar”,设置进度条最大值“max_value”表示最大生命值,设置进度条当前值“value”表示当前生命值,如果当前生命值为0,则移除boss。
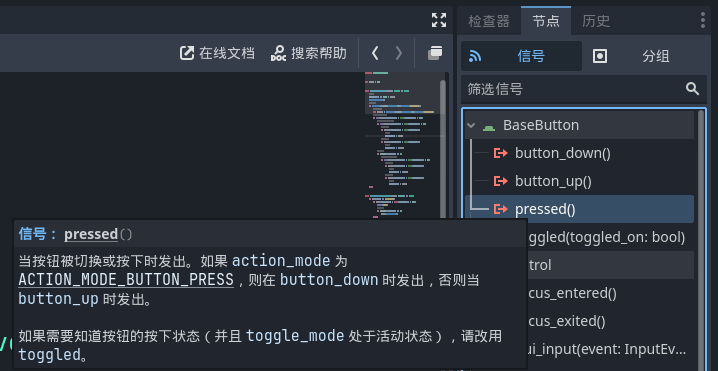
当角色死亡时,场景弹出开关按钮“Button”,玩家可以选择重新开始或者退出。开关按钮同样可以通过连接信号进行使用,“pressed()”代表按钮被按下时发出信号并执行事件。
重新加载游戏的方法为使用变量“var level = load("path").instantiate()”重新加载关卡场景,其中“path”为关卡场景的“res://” 文件路径,可以直接从编辑器文件系统拖拽。关卡加载完成后,需要“get_tree().root.add_child(level)”将加载好的关卡加入场景,并使用“get_tree().current_scene.queue_free()”删除当前关卡场景。
此外,退出游戏的方法为“get_tree().quit()”。
同理,游戏获胜也需要弹出标志进行提示,也可以选择重新开始或者退出。获胜的条件可以选择一个位置放置“Area2D”节点,并放置终点标志,标志可以是图片,也可以是动画。在玩家到达终点区域时,弹出按钮,弹出获胜文本或图片动画等。如果使用上文提到的load()的方法加载按钮和获胜样式,可以同时删除关卡场景。
如果获胜过于简单,可以设置关卡难度。
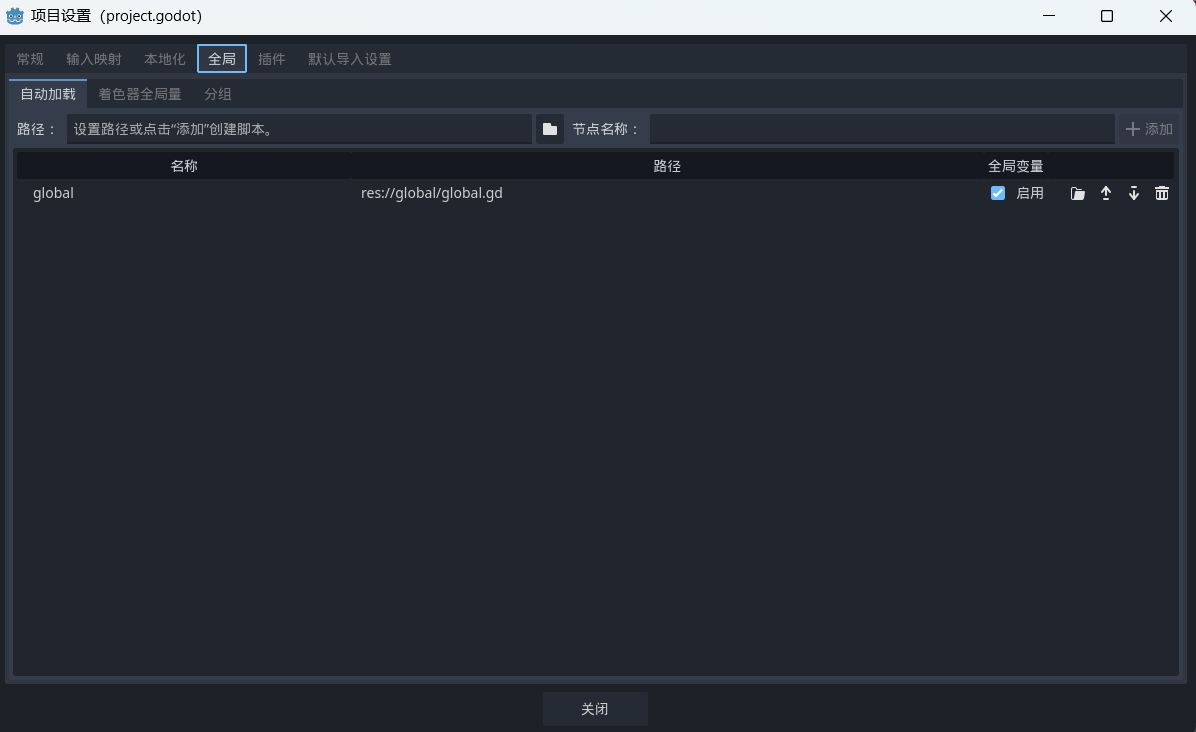
关卡难度设计使用全局脚本,声明变量diffcult存储关卡难度。在所有场景脚本中,都可以通过全局脚本名称加其中的变量名或函数名,使用全局脚本中的变量或函数。在游戏进行时,关卡场景可能会不断变化,因此全局脚本的作用就体现出来了,它可以提供稳定的中间变量和公共函数,让多个场景相互访问数据和使用函数。
如果你对godot的全局脚本有印象,那么这个图应该不陌生。
调整难度可以使用“Slider”中的“HSlider”控件或者“VSlider”控件,并连接信号,在控件的值发生改变时将控件值传给全局脚本“global.gd”中的“diffcult”变量。
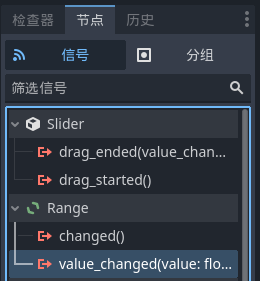
“value_changed(value:float)”信号中可以直接使用“global.diffcult = value”将改变后的值“value”传给全局脚本“global”中的“diffcult”变量。
因为有3个难度,如果最小值为0,最大值应为2。
所有代码(不包括着色器代码)如下:
godotor.gd
extends CharacterBody2D


var speed = 1300.0
var jump_velocity = -1600.0


func godotor_move(delta):
	if Input.is_action_pressed("go_left"):
		$".".position.x -= speed * delta
	if Input.is_action_pressed("go_right"):
		$".".position.x += speed * delta
	if Input.is_action_pressed("jump") or Input.is_action_pressed("go_up"):
		#头上没有碰撞体时
		if not is_on_ceiling() and not is_on_wall():
			$".".position.y += jump_velocity * delta


func _physics_process(delta: float) -> void:
	#如果不与天花板发生碰撞,计算重力
	velocity.y += 1000 * delta
	velocity.x = 0
	godotor_move(delta)
	#根据velocity移动
	move_and_slide()
enemy.gd
extends CharacterBody2D


var speed = 350


func _physics_process(delta: float) -> void:
	#计算重力
	velocity.y += 1000 * delta
	move_and_slide()
	#如果存在目标
	if get_tree().root.get_child(1).has_node("godotor"):
		#将角色设置为目标
		var target = get_tree().root.get_child(1).get_node("godotor")
		#如果横向绝对距离小于500
		if abs(target.position.x - $".".position.x) < 500:
			#如果目标不在躲避范围内,进行追踪
			if abs(target.position.x - $".".position.x) > 80:
				#如果目标在右侧
				if target.position.x > $".".position.x:
					#向右移动
					velocity.x = speed
				#如果目标在左侧
				if target.position.x < $".".position.x:
					#向左移动
					velocity.x = -speed
			#难度2及以上
			if global.difficult >= 2:
				#如果目标在躲避范围内,进行躲避
				if abs(target.position.x - $".".position.x) < 80:
					#如果目标在右侧
					if target.position.x > $".".position.x:
						#向左移动
						velocity.x = -speed
					#如果目标在左侧
					if target.position.x < $".".position.x:
						#向右移动
						velocity.x = speed
	pass


func _on_area_body_entered(body: Node2D) -> void:
	if body.name == "godotor":
		if body.position.y - self.position.y > -65:
			print("桀桀")
			#难度1及以上
			if global.difficult >= 1:
				body.queue_free()
		else:
			body.jump_velocity -= 200.0
			self.queue_free()
	pass
boss.gd
extends CharacterBody2D


var speed = 400
var health = 200

func _physics_process(delta: float) -> void:
	if health <= 0:
		get_parent().can_win()
		self.queue_free()
	$boss_health_background/boss_health.size.x = health
	#计算重力
	velocity.y += 1000 * delta
	move_and_slide()
	velocity.x = 0
	#如果存在目标
	if get_tree().root.get_child(1).has_node("godotor"):
		#将角色设置为目标
		var target = get_tree().root.get_child(1).get_node("godotor")
		#如果横向绝对距离小于2000
		if abs(target.position.x - $".".position.x) < 2000:
			#如果目标不在躲避范围内,进行追踪
			if abs(target.position.x - $".".position.x) > 150:
				#如果目标在右侧
				if target.position.x > $".".position.x:
					#向右移动
					velocity.x = speed
				#如果目标在左侧
				if target.position.x < $".".position.x:
					#向左移动
					velocity.x = -speed
			#难度2及以上
			if global.difficult >= 2:
				#如果目标在躲避范围内,进行躲避
				if abs(target.position.x - $".".position.x) < 150:
					#如果目标在右侧
					if target.position.x > $".".position.x:
						#向左移动
						velocity.x = -speed
					#如果目标在左侧
					if target.position.x < $".".position.x:
						#向右移动
						velocity.x = speed
	pass


func _on_critical_area_body_entered(body: Node2D) -> void:
	if body.name == "godotor":
		health -= 20
	pass


func _on_hurt_area_body_entered(body: Node2D) -> void:
	if body.name == "godotor":
		health -= 7
	pass


func _on_attack_area_body_entered(body: Node2D) -> void:
	if body.name == "godotor":
		health -= 5
		#难度1及以上
		if global.difficult >= 1:
			body.queue_free()
	pass
level_1.gd
extends Node2D


#角色初始化函数
func charactar_init():
	#实例化godotor场景准备加载
	var charactar = load("res://charactar/godotor.tscn").instantiate()
	#设置初始化位置
	var init_position = Vector2(0, -100)
	#向场景中加入角色
	add_child(charactar)
	#设置角色的初始位置
	charactar.position = init_position


func can_win():
	$wall/dynamic_wall13.queue_free()


func _ready() -> void:
	#使用角色初始化函数
	charactar_init()
	pass


func _input(event: InputEvent) -> void:
	if event is InputEventKey:
		if event.is_pressed():
			if event.keycode == KEY_ESCAPE:
				$view/button.show()


#声明godotor变量
var godotor:CharacterBody2D
func _process(delta: float) -> void:
	for charactar_ in get_tree().get_nodes_in_group("charactar"):
		#难度0
		if global.difficult == 0:
			#(判定角色死亡)如果角色的位置掉落到1000以下
			if charactar_.position.y >= 1000:
				#删除角色
				charactar_.queue_free()
		#难度1及以上
		if global.difficult >= 1:
			#(判定角色死亡)如果角色的垂直速度大于2000
			if charactar_.velocity.y >= 2000:
				#删除角色
				charactar_.queue_free()
	if global.difficult == 1:
		$disaster.show()

	#如果存在“godotor”节点
	if has_node("godotor"):
		#获取“godotor”节点,并赋值给godotor变量
		godotor = get_node("godotor")
		#同步相机的位置
		$view.global_position = godotor.global_position

		#boss检查
		if godotor.position.x >= 9222:
			$boss_background.show()
	#如果不存在角色
	else:
		#显示按钮
		$view/button.show()

	#如果开启了boss战
	if $boss_background.visible:
		$boss_background.color = Color(randf(),randf(),randf(),randf())
	pass


#当重开按钮按下时
func _on_again_pressed() -> void:
	#隐藏按钮
	$view/button.hide()
	#隐藏获胜图块
	$view/end_rect.hide()
	#重新加载角色
	#charactar_init()
	#或者重新加载关卡
	var level = load("res://level/level_1.tscn").instantiate()
	#在root节点中添加关卡
	get_tree().root.add_child(level)
	#删除当前场景
	get_tree().current_scene.queue_free()
	pass


func _on_quit_pressed() -> void:
	get_tree().quit()
	pass


func _on_end_body_entered(body: Node2D) -> void:
	if body.name == "godotor":
		#显示获胜图块
		$view/end_rect.show()
		$view/button.show()
	pass


func _on_disaster_area_body_entered(body: Node2D) -> void:
	if body.name == "godotor":
		if global.difficult >= 1:
			body.queue_free()
		pass
	pass


func _on_difficult_value_changed(value: float) -> void:
	global.difficult = value
	$view/button/difficult/Label2.text = str(global.difficult)
	pass


func _on_difficult_tree_entered() -> void:
	$view/button/difficult.value = global.difficult
	$view/button/difficult/Label2.text = str(global.difficult)
	pass
npc.gd
extends Sprite2D


func _ready() -> void:
	pass


var say_time:int
var delta_ = 0
var get_time
func _process(delta: float) -> void:
	get_time = Time.get_ticks_msec()
	#每秒约更新20次
	if delta_ - get_time < -50:
		delta_ = get_time
		if say_time != 0:
			$label.show()
			say_time -= 1
			if say_time <= 0:
				say_time = 0
				$label.hide()
		else:
			pass
	pass


func _on_area_body_entered(body: Node2D) -> void:
	if body.name == "godotor":
		say_time = 60
	pass
speed_buff.gd
extends Sprite2D


func _on_area_body_entered(body: Node2D) -> void:
	if body.name == "godotor":
		print('godotor')
		body.speed += 300
		$".".queue_free()
	pass
jump_buff.gd
extends Sprite2D


func _on_area_body_entered(body: Node2D) -> void:
	if body.name == "godotor":
		print('godotor')
		$".".queue_free()
	pass
global.gd
extends Node


var difficult:int = 0
关卡节点信息如下:
其实将控件挂在相机上并不是很好的方法,但是在跟随运动时也可以防止抖动。还有一种常用的方法是使用“CanvasLayer”节点,需要注意的是“CanvasLayer”节点只作为渲染使用,在该节点上挂载碰撞体可能会导致节点位置不同步,不过用来挂载控件类(“Control”)及其子类,是不错的选择。
关于代码规范,在绝大多数项目中,不允许变量名、函数名以及文件名中出现语言混用,并且要求代码整洁对齐。
更高的要求会让代码编写时将条件分支闭合、使用寻址代替部分循环语句等,本文不做展示。
总结
游戏关卡设计基于游戏的玩法设计,在确定游戏的模式之后,进行初步验证。可以先对角色的外观进行设计,再配置临时关卡进行角色的操作调整。有必要时,如果需要验证角色的相互作用,也可以使用该流程。
完成初步验证之后可以根据内容进行扩展验证。在扩展验证中可能会涉及许多与初步验证矛盾的功能需求,这时候如何取舍,往往只能凭借个人理解进行调整。不过,如果条件允许,可以使用一些大模型对话助手进行辅助,如:文心一言、kimi、讯飞星火等。不过通过大模型获取的信息依然需要自行识别与验证。
此外,在扩展验证中不应盲目增加玩法规则,应从功能完整性角度出发,在已有承载框架下进行扩展,尽量将大框架变为多个小关卡,灵活使用场景跳转,减少数据载荷。
最后,游戏的趣味性与游戏中采用的编程技巧固然是游戏开发中十分重要的环节,但游戏本身也是文化作品,会传递情绪与思想,因此,编者也希望诸位游戏开发者秉持积极的文化与历史心态,制作出精美佳作。
本文到此结束。